
General Electrical Project How To Videos
How to Connect Wires & Lights to a Power Jack
In this video, we show you how to connect LED wires and lights to demonstration models using a power jack. Shop our collection of wires and power supplies today!How Can I Strip Magnet Wire?
Magnet wire is very fine with a tough enamel and polymer jacket coating. It cannot be stripped with ordinary strippers. We show an easy way to strip the wire, by sanding.Video Transcription
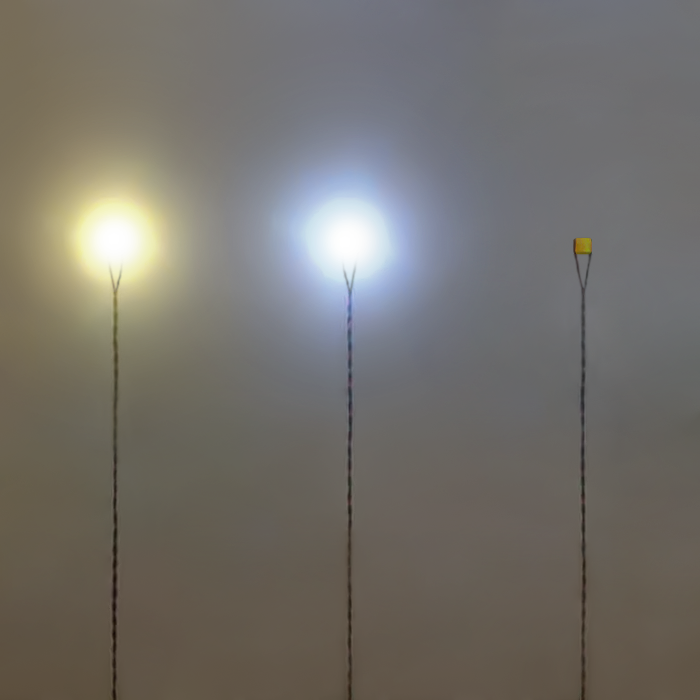
Magnet wire has a very tough coating of enamel plus polymer and it cannot be stripped by a regular wire stripper. There are times when you’re going to need to cut the wire and expose some of the copper so you can make a connection.
So this light as an example, you can see that we have a nice clean edge. But if I need, for some reason, to shorten the wire on this light, the light won’t light anymore because we have not exposed any copper like this. So this light no longer lights.
But one way to strip it, you can strip it with heat or you can strip it with sandpaper. This is 100 grit that I have here. You’re going to want to go ahead and sand until you see some nice clear copper. You’re not going to sand too far, you don’t have to worry about breaking the wires if you just go slowly. Make sure that you see clean copper, and then it's a good idea to turn it over and do the other side.
What I’ve noticed is that the green for some reason takes a little bit more sanding than the red to get nice clean copper exposed. Now you should be able to see that there’s nice bright copper here and you’re not seeing any more of the insulation. We know we’ve gone far enough because our light now lights.
How to Use a Super Fine Wire Stripper
Our LEDs have very fine and tough kynar wire, which can be hard to strip with commonly available wire strippers. Learn how to use our super fine wire stripper.Video Transcription
Our LEDs come with fine tough kynar wire. It’s easy to get into your projects, but it can be hard to strip. We carry a wire stripper that goes down to the gauge that these wires are. So if you’ve shortened the wire on your LED, you still need to strip it before you put it into your project. The thing to remember about wire strippers is that you don’t want to pull against the LED, you want to pull the wire away from the stripper. A nice stripped wire.
How to Solder Wires for Mini LED Lights
Watch this short video to learn how to easily solder wires together, and shop our collection of wires and switches today!How Do You Strip Fine Kynar Wire?
The kynar wire we sell has a tough coating and many common wire strippers do not go down to this fine gauge. We have found using a solder iron to strip the wire is quick and easy and doesn't mess up your solder iron!How To Use Fiber Optic for Mini LED Lights
Fiber Optic can be used to bring light to different locations in your hobby project. It is great for indicator lights on a dash or for candles in a window. You can run several fibers off one LED light.Video Transcription
A lot of people ask us how to use fiber optic and I want to say that there are quite a few ways to use fiber optic but I’ll show you the way that we’ve come up with that we like to use. I take a 3mm LED, the top of the 3 mm LED is kind of round, like a bowling ball, and it’s hard to glue to. So what we do is just take it and sand it very briefly until we have a nice flat LED. I don’t know if you can see but this LED is very flat across the top so it’s easy to stick things to it.
So then I take our 3/32nd shrink tube and it turns out the 3/32nd fits very snuggly over the 3mm LED. This does two things; it blocks out all the sidelight because it is opaque, and also it holds the fiber optic very firmly onto the LED so it doesn’t fall off. I will take this shrink tube and slip it over my three pieces of fiber optic. You can fit quite a few pieces in here, I just did three pieces to show the different sizes.
Then I’m going to want to glue the fiber optic to the LED. There’s a lot of glues you can use. I used UV curing glue because it has a long setup time. I’m going to hold the three pieces of fiber optic right onto the LED, make sure I have them on firmly and then you want to have someone hit it with the UV light to make sure you have a nice solid cure.
Then I slip the shrink tube over the 3mm LED and over the fiber optic. Now you can heat the shrink tube, but you want to be careful not to heat for too long because you don’t want to accidentally melt your fiber optic. You have to be a little bit gentle with the heat.
I can show you now, when I turn on the LED, you can see a little bit of the light coming out of the fiber optic but you don’t see any light around the LED, and here are my three different sizes. You can see they are nice and bright.
When, Why and How to use Wired Connectors in Hobby LED Projects
Connectors can make working with LED lights easier. We have a variety of options to connect your LEDs to your power and split the power to groups of LEDs in ways that make sense. Check out our full selection of connectors and wiring options!Video Transcription
These are our pin connectors. They come prewired with 8 inches of wire. We’ve got a red and a black wire on here so that you can keep track of which is positive and which is negative as you go. You can take this connector and twist it to your lights, and then you have different power supplies you can connect to the other end of the connector.
So for this example, I’m just putting 5 lights on here. I put shrink tube on first so that I won’t have any shorts. You want to connect black to black and red to red, just make sure you make a nice firm twist, and slip your shrink tube on. Before you go ahead and shrink the shrink tube, it is always a good idea to test everything before you make your final shrink of the shrink tube.
Now I’ve got shrink tube on here, I can connect this to the female, we sell them as pairs, if I have my own power supply I make sure to connect red to red and black to black whenever you make a connection. If I have my own power supply, I can just screw this right into my power supply or we sell a lot of our power supplies with a female already attached.
So I can just connect this to here and I’ll just demonstrate that I can light these this way. It’s kind of nice to get your AA battery holder with this connector because you can store your AA batteries separate from your project. I can easily unplug this for storage and not have to disturb the lights inside of my building or inside of my model, and then I can just plug it back in again. We also have several other of our power supplies like our 9-volt battery snap with a female end, AAA battery pack, and the power jack.
The power jack goes on our power adapter and this is nice because you can connect to this power adapter when you’re near a wall plug, and then later connect to the AA battery. You can see it’s the same connector so that you can easily switch from the wall adaptor back to AA.
We also have splitters, if you want to bring power from your power supply out to 2 different locations. Because the splitters are on 8-inch wire, now I’ve got a way to have my lights up to 16 inches apart because I can have one connector here and one connector there.
We also have a 5-way connector which is really nice if you have, say, buildings that you want to move around or you have 5 different models. You can connect a 5-way to another 5-way, or a 5-way to a 2-way, and then you have even more ways to bring your power. This is nice if you have a multi-layer project that you know you’re going to want to have to move.
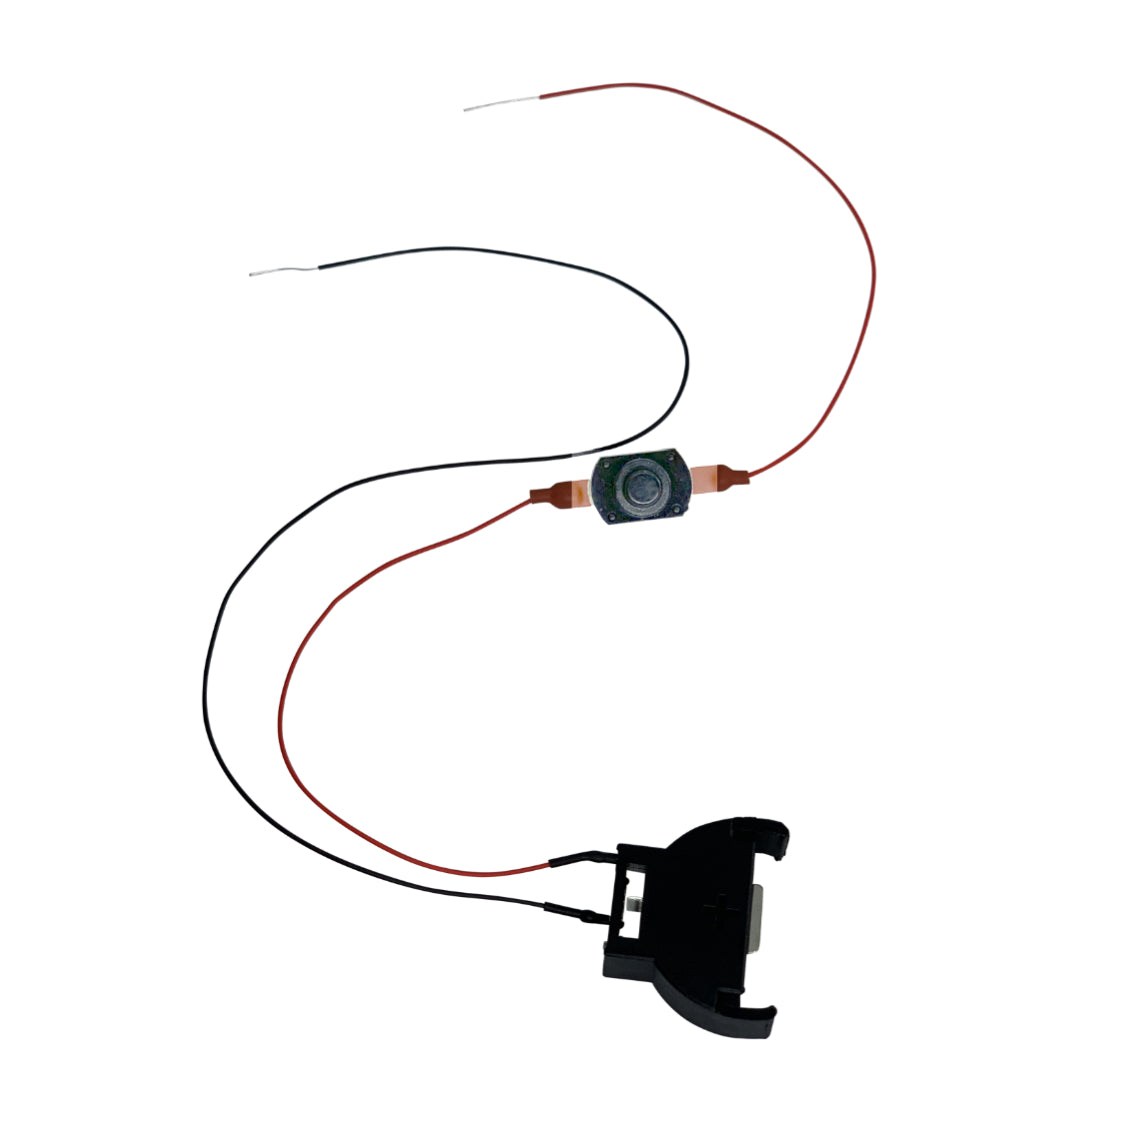
We also have extenders, it’s just the same male and female connected to each other if you want to extend the power further from the power supply. We also have an extender with a switch, this is nice if you want to be able to switch on and off different parts of your project at different times. I can put an extender with a switch here and another switch here and I’ll be able to turn these on and off independently of each other.