
Soldering 101- How to Solder Micro LED Lights
Here at Evan Designs, our mini hobby LEDs come pre-soldered with resistors and wires attached. This is an easy solution that allows you to install your battery powered LED light kits immediately in your hobby projects. Hooking up pre-wired Evan Designs LED doesn’t require soldering skill, in fact if you review our LED hookup recommendations you will see no reference to soldering.
However, for some special projects or for those of you who are interested in electricity and soldering this article will go over the process used to create all of our micro LEDs at Evan Designs. Soldering is a process that requires delicate skill and technique. Due to this, we can not guarantee results, and can not offer replacements on burned or broken LED battery lights due to too hot of a soldering iron or other issues. This being said, let's review the basics of soldering to deepen our understanding of the battery operated LED lights we all love to use in our hobby models.
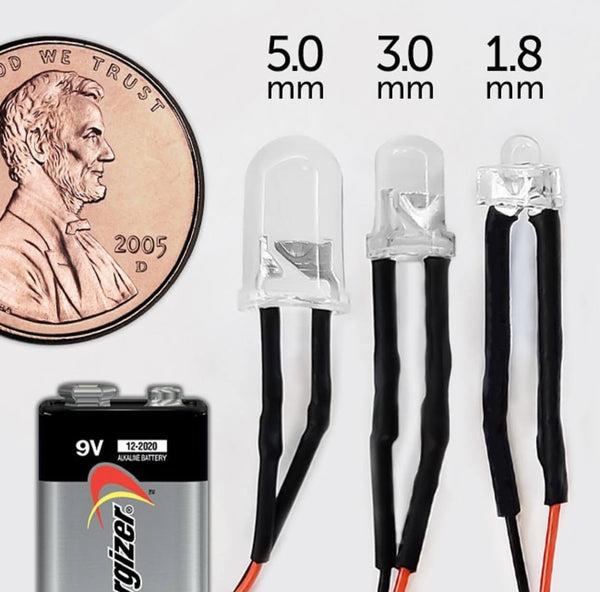
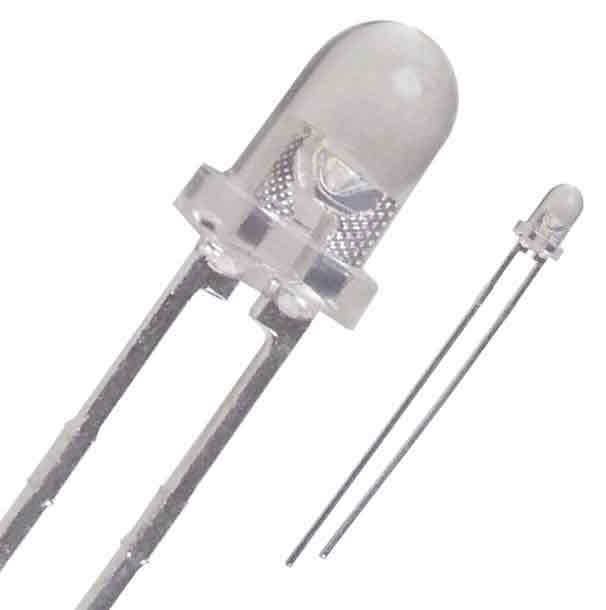
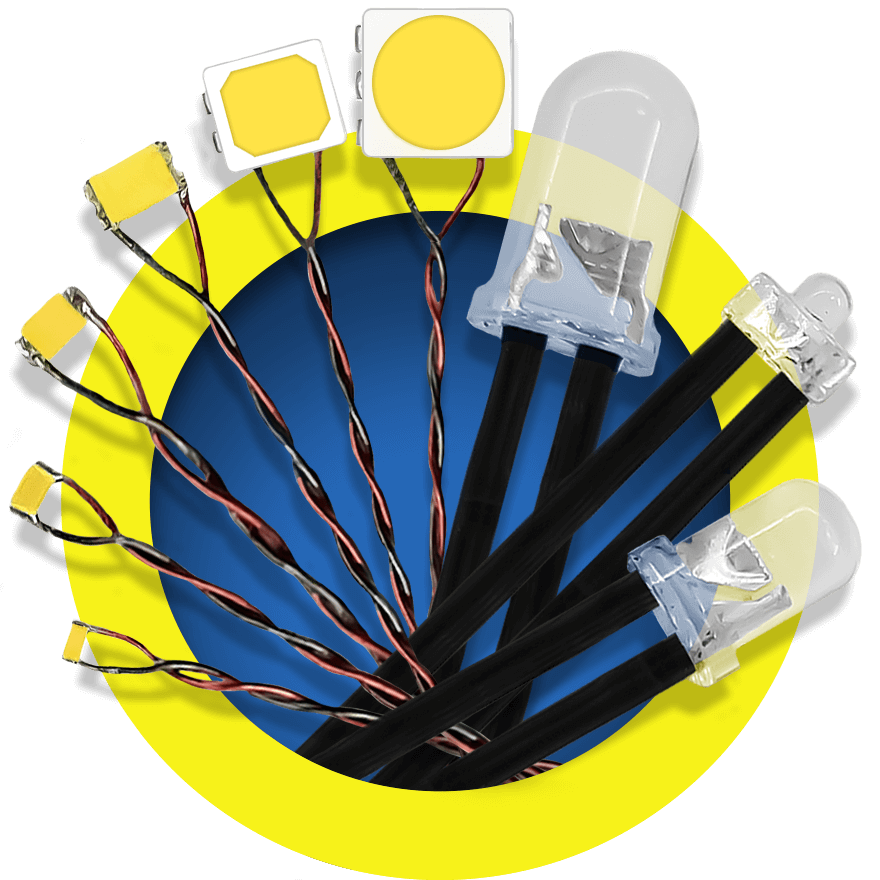
Evan Designs Bulb Style Micro LEDs
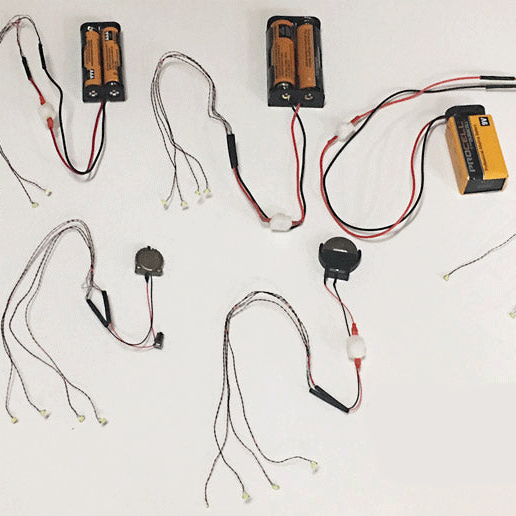
Bulb style LEDs come in 3 sizes: 5mm, 3mm, and 1.8mm. All can be soldered to the Wire of the Battery Holder, Power Supply or General Wiring . We do not offer loose chip lights nor recommend you solder them on your own as this requires unique soldering skills, specialized solder equipment and partice.
About Solder
First of all, what is solder made of? Solder is a fusible metal alloy used to permanently bond two metal components, such as small LEDs, resistors, and wires. This metal alloy allows for the continuous flow of electrons through a given circuit. Solder is made of a mixture of lead, tin, and sometimes silver. The lead component in the solder is not dangerous because lead has a low melting point. At this low melting point of 230 C or less, the temperature at which your soldering iron will be set to, the fumes from the lead are not vaporized. This being said, it is still important to solder in a well ventilated area. We also recommend having a fan nearby to blow away fumes from your soldering.
Using Flux
Solder on its own will not stick well to the mini LED legs. Due to this, some people use Flux, an adhesive component put on the components to soldered before melting the solder. Alternatively, you can buy rosin core solder with the adhesive material already inside at the core to eliminate a step and ensure easy adhesion. We prefer the flux in a paste form. Without further ado, let's get started soldering!
Things you will need to get started:
- Evan Designs Bulb Style micro LEDs, Figure A
- Digital soldering iron set to 230C or less
- Rosin core solder
- Resistors
- Red and black Kynar wire
- Shrink Tube
- Lighter or heat gun
Now we have our supplies, let's move on to our step by step process.
-
Plug in your soldering iron, and set the temperature to less than 300 Degress C.
Do this first as it will take a few minutes to heat up.
-
Identify the long and short legs on your bright LED light.
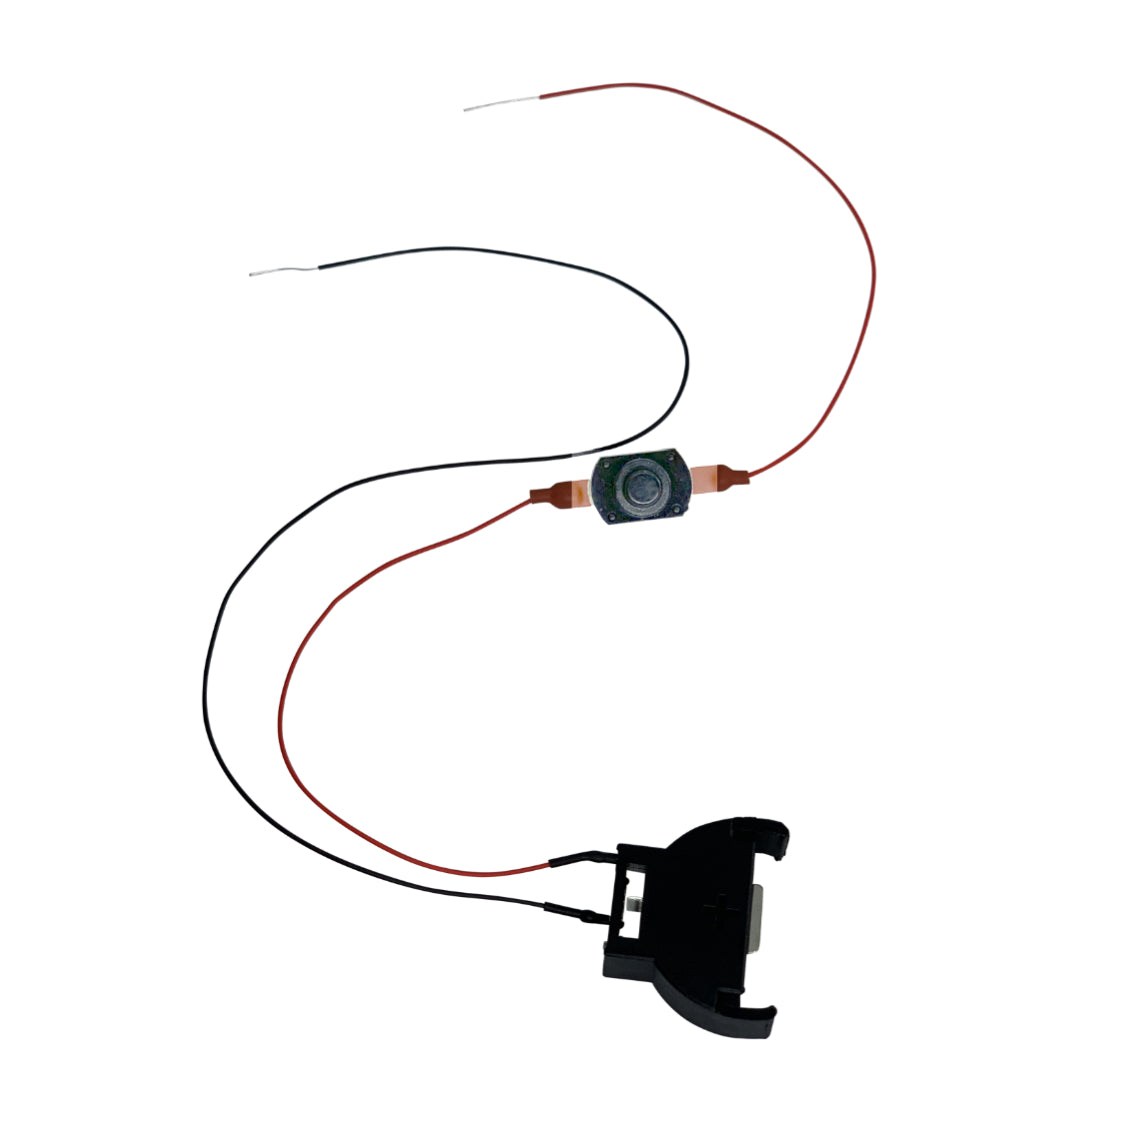
The short leg is the (-) and the long leg is the (+), see Figure A above. The (-) will go to a length of black Kynar wire + will go to a length of red Kynar wire.
-
Identify what resistors you will need to use.
Warm and Cool White hobby LEDs, as well as Green and Blue battery operated LEDs do not require a resistor when they are run at 3 volts. All other colors of LED lights and LED light kits sold at Evan Designs need a resistor to run at 3 volts. At 5-12 volts and 7-19 volts, all mini LEDs need a specific resistor with a specific ohm value to protect the LED against too much current which will destroy the LED. The resistor used is based on a calculation using maximum operating Voltage, LED design voltage known as Forward voltage. The resistor value can be determined by the following equation.
Resistor Value = (Source Voltage-LED Forward Voltage) / LED current draw
For example if you want to run a 5mm Cool White Bulb hooked to a 9 Volt Battery we get a minimum required resistor value of 315 ohm. It's fine to use a larger value, however at some point you may find the LED becomes noticeably dimmer. We find that you may not see much loss of brightness until the value is over double the minimum value.
By purchasing any of our LEDs which have the required resistor pr-soldering into the wire you will not need to determine resistor value leaving you more time to devote to your project and hobbies.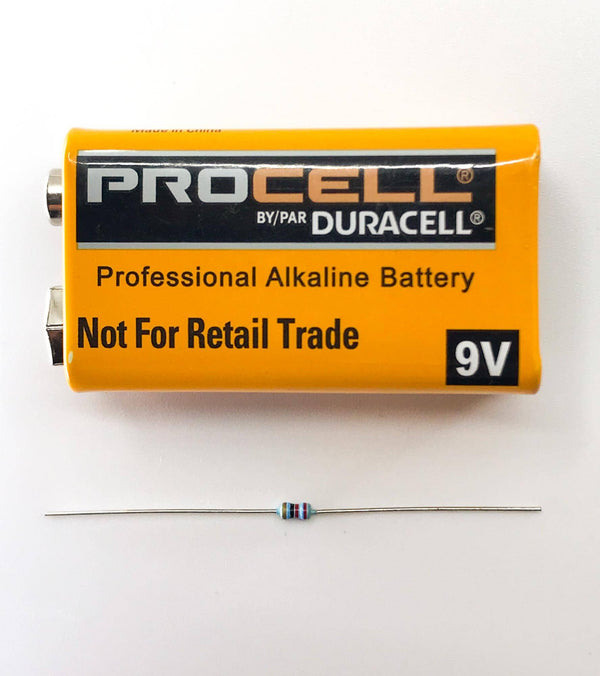 A 9 volt resistor with a 9 volt battery
It is important to match your resistor to your power source to avoid damaging your model lights.
-
Trim the resistor and LED legs to your desired size.
This is an optional step, for smaller connections. However, make sure not to lose track of which side is + and - of the mini LED. We attach a Red wire to the + side Black for the (-). With SMD LEDs we prefer to use Magnet Wire, and since Magnet Wire is hard to find in Black we use Green Magnet Wire for the (-) connection
-
Cut and strip your desired lengths of Kynar wire.
Strip about a ¼ inch of insulation on both sides of the wire. You should have one red and one black wire ready for your brightest LEDs.
-
Apply solder paste or rosin to the LED legs and wires!
This coating will attract the solder allowing it to easily flow across the wires you wish to join.
-
You are now ready to solder!
It doesn't matter what leg of the hobby LED we attach the resistor to because the resistor cuts down amperage flow to the circuit and its too much amperage that destroys LEDs.
-
Begin by melting a small portion of solder with your soldering iron.
Keep this solder dot on the iron. Align the desired micro LED leg with your resistor and deposit the solder from the iron to the connection. Make sure not to get too close to the model LED light, as the heat will damage it. Also take care not to burn yourself. Ideally the connection should take less than a second, however this may take practice. As mentioned earlier LEDs DO NOT LIKE HEAT so we want to minimize the time spent at this connection, with the iron set to as low of a temperature as will allow the solder to easily flow. Note if you are not using a resistor (refer to step 3) skip this step.
-
Check your connection.
Once cooled, give the tiny LED leg and resistor a light tug. It should feel sturdy like it is one piece. If your connection feels loose, repeat step 8.
-
Attach Kynar Wire.
Solder black Kynar wire to the (-) end of your micro LED light. Connect the red Kynar wire to the + end of your micro LED using more solder and the same process as detailed in step 8.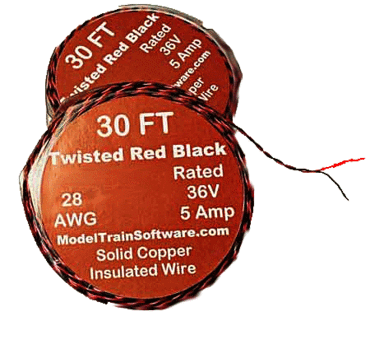
-
Test your light.
After checking your connections it is time to test your creation! Connect the black and red wires of your LED kit to a battery that you plan to use.
-
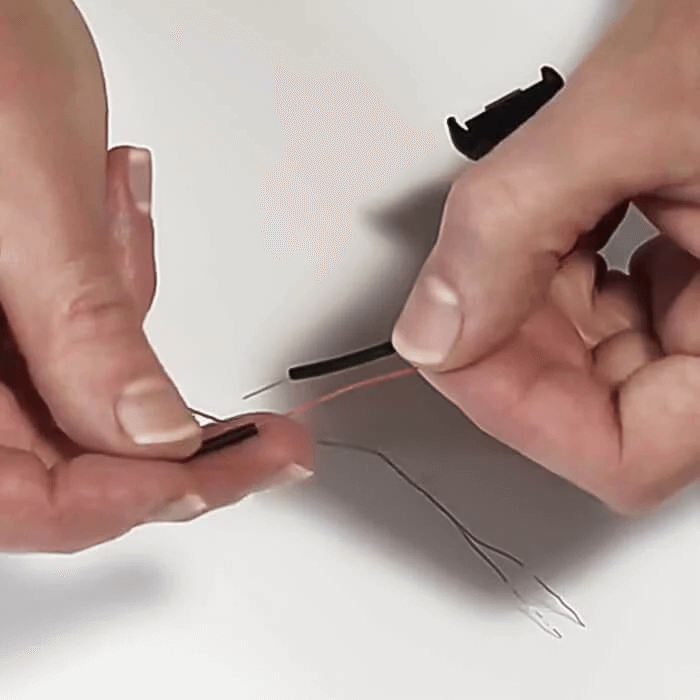
Protect your connections.
Cut two pieces of shrink tube to cover the mini LED legs and resistor. The shrink tube is used to protect the connections and prevent the - and + terminals of the hobby LED from touching. If these two terminals touch, they will create a short circuit that would cause the small LED to get hot and burn out. If you do not have shrink tube, electrical tape can be used instead.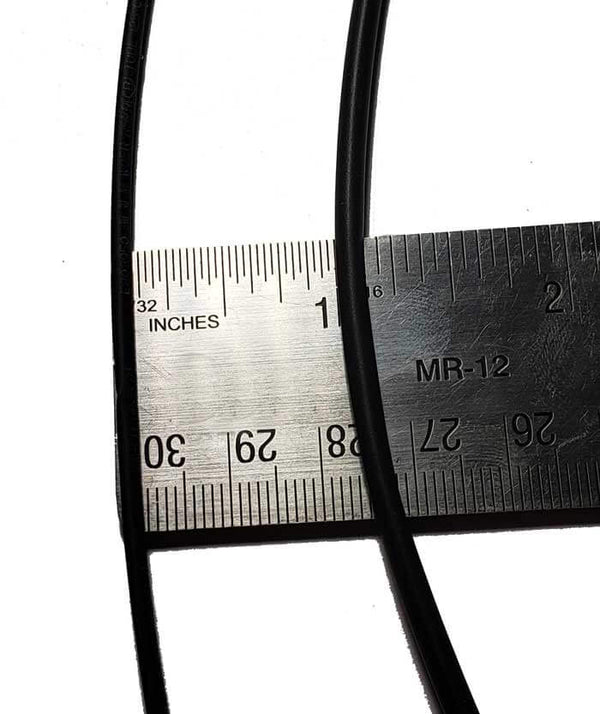 Evan Designs Shrink Tube
Available in 1/16th inch and 3/32 inch diameter. The shrink tube we see is thin-walled, easy to shrink, it takes up very little space after shrunk and is a great way to safeguard your hobby models.
Heat the shrink tube.
Use a lighter, a heat gun, or a hairdryer to shrink the thin-walled shrink tube. Make sure not to get too close to the tiny LED light with the heat and heat the shrink tube only until it has shrunk, you will see it stop shrinking..


Congratulations!
You have now soldered your first micro LED circuit. We hope you found this article informative, and remember soldering is a skill that takes practice. You may not be successful in soldering hobby LEDs on your first attempt. There are many different methods of soldering, but this is the method we use at Evan Designs to make the battery operated LEDs you all know and love. We’d love to hear how soldering worked out for you, comment below with any soldering-related tips or stories. We only touch upon the basics of soldering.
More about soldering LEDs
For those who wish to learn more about soldering LEDs for your projects you will want to explore more information about LED forward voltages, the LED amperages, resistors.
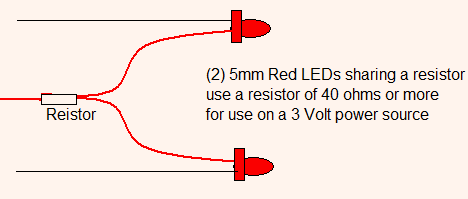
Did you know you can share a resistor with more than one LED. The value of the resistor will be the sum of the # of LED that you will be protecting. Be sure that the mAmp value does not exceed the design capacity of the resistor or the resistor will overheat. Also make sure all the LEDs that share a resistor have the same forward Voltage.
Search “Evan Designs News and How Tos” blog
Recent articles

Leave a comment