
Model Lighting Kits Videos
What is in the Mini LED Lighting Packet?
Find out how easy it is to light LEDs with our Mini Lighting Packet, which includes Warm White LEDs, a Compact Switch, a Coin Cell Battery and Holder, and a Shrink Tube.How to Use a 3-Volt LED Model Fire Kit
Quick how-to video on our popular LED fire model lighting kit. Choose from 5 different LED sizes. Available in 3-volt DC, 5-12 volt DC, or 7-19 volt AC/DC/DCC. Get yours today!Video Transcription
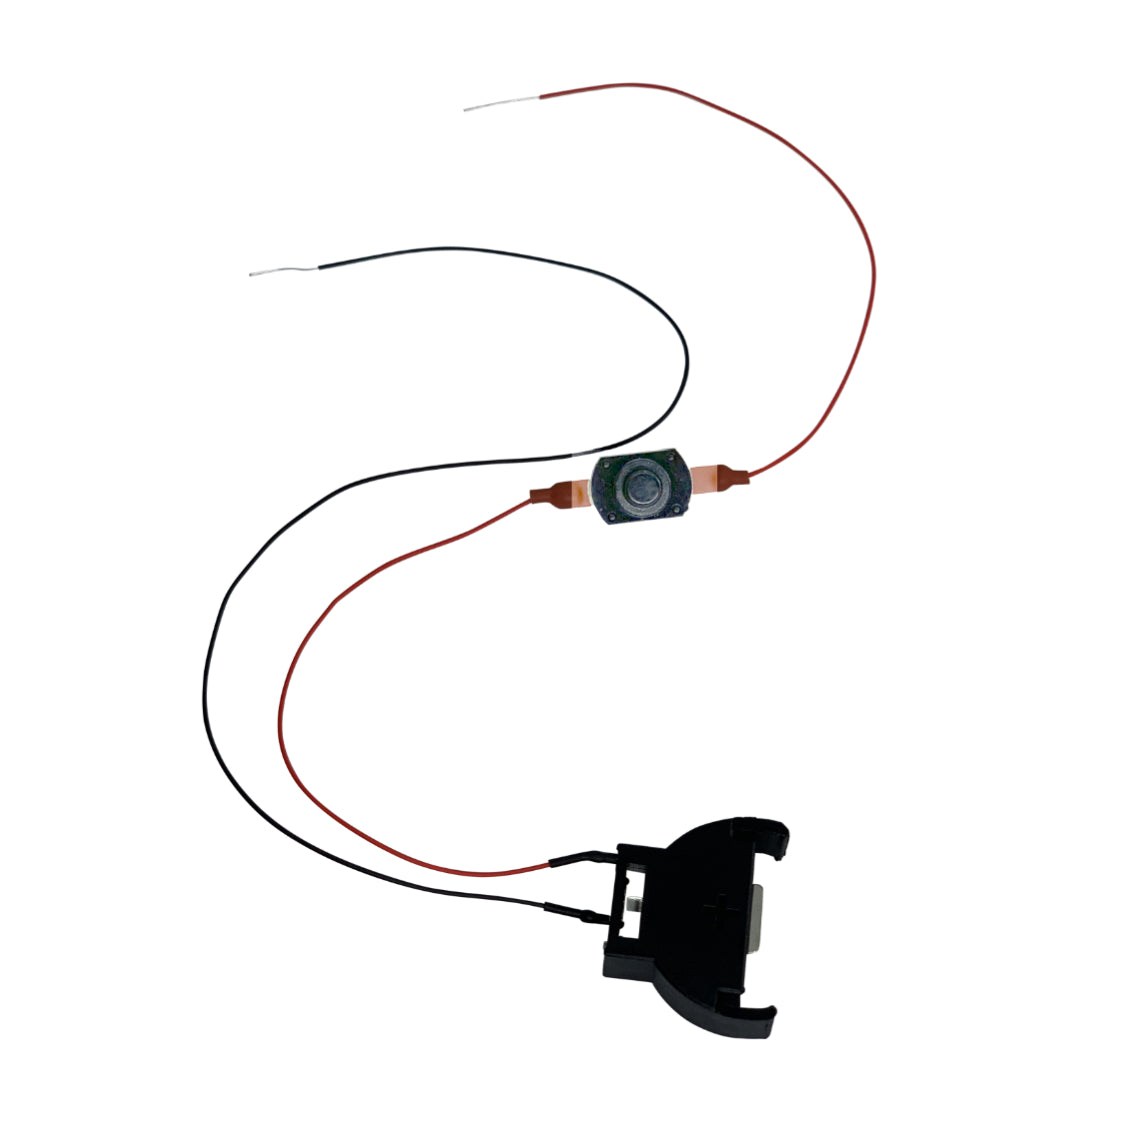
Another kit we have is a fire kit and since this is a fireside chat, I thought it might be fun to do a little bit of fun to do a little bit of work with the fire kit. It comes the same way; with its own coin cell holder and switch. The reason the fire comes with its own coin cell is because the fire and the room lights can’t really behave well together. Sometimes with the 3-volt coin cell, you’ll see that the fire is starting to make the room lights flicker. And sometimes too, it’s nice to have the fire on its own control because sometimes maybe you want to have a fire and no room lights, or sometimes you want to have the room lights on but not the fire. This gives you the control because you have a separate switch just for the fire, you can turn your fire on and off whenever you like. This kit also comes with a little bit of cellophane, and the point of the cellophane is that you can crumple it up and put it over the lights and that will give your lights nice diffraction so that they go different ways.
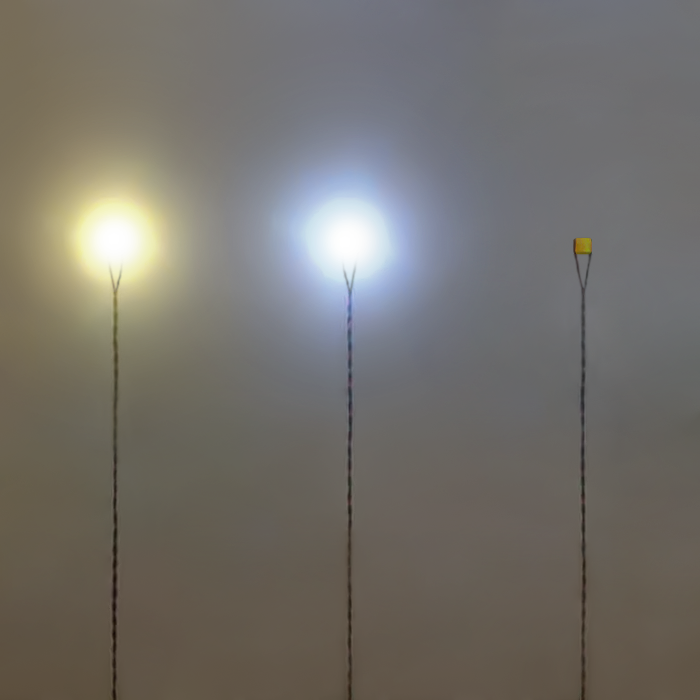
Now, this kit, you’ll see, has 3 lights in it. There’s a solid orange, a flashing orange, and a flashing red. The 3 together, when you put them tightly together, is what gives you the nice effect. So this kit has the same basic idea: you have red wires and black wires. You would thread these in through your fireplace and out of your building, and then you would go ahead and put on your shrink tube. Twist really firmly, and don’t worry if you break anything, it is a free replacement. So don’t be worried about twisting too firmly. What you’re doing there is making sure you have a solid connection between all of these lights and your power supply. The same thing with the blacks, some nice firm twisting. Now put your shrink tube on, and the point of the shrink tube is that it protects the connection so that you can’t have the red and black striped areas touch each other. If they were to touch each other, it would just cause a short circuit and your battery would just get a little hot. If you fix the problem, it would just restore everything. It wouldn’t do any permanent damage.
So you can see I’ve got my connections here. Now I’m going to put it in my coin cell, checking to see the positive on the coin cell and the positive on the holder. Go ahead and turn on the on the switch, you can see we have a little fire going on here. It’s a very safe fire, it’s not hot. And you can see what the fire looks like with a little bit of cellophane over it. The other thing people like to use instead of cellophane is silicone: the clear silicone that is sold as goop or sold as aquarium sealer. It comes in a little tube, like a toothpaste tube. But as you can see, we have a nice little bit of flickering going on. The other question I get is how I make this fire look like it has logs and things.
Creating a Fire with Our Mini LED Lighting Kit
Watch this short video to learn how to create a realistic fire with our mini fire LED lighting kit and other easy to find items!FRED Simulator LEDs Installed on N Scale Boxcar
Short video of our flashing red LED lights installed on an N Scale Boxcar. Shop our FRED Simulator LEDs today!FRED LEDs Installed on HO Scale Boxcar
Video of our FRED Simulator LED lights installed on an HO Scale Boxcar. Check out our Model Trains gallery for more examples of what our flashing LEDs can be used for!Fire Lighting Kit Example Made with Mini LEDs
Check out an example of our easy to use mini LED Fire Lighting Kit - Pre-wired and ready to use with a 9-Volt battery or 12-Volt wall adapter. The fire gets its look from a combination of flashing and solid LED lights.Welding Mini LED Lighting Kit
Our Welding Pack is a combination of 3 LEDs: 2 Flashing White and 1 Solid Blue. The secret to the welding effect is the very different flash rates of the LEDs, giving a realistically random effect. No circuit board needed. Sold as a pack of 3 lights.What is a Chip Light Kit and what's in it?
Our battery light kit has what you need to light up a small model project. Included in the kit is a small "chip" light, a battery and a holder with an on off switch, and a shrink tube for the connections. Pick one up today!Video Transcription
Our chip light kit is a very popular kit. I think one reason is because we’ve included everything you need to go ahead and get started with the project. We have the kit with single light or we have 2 light, 3 light, or 4 light kits. You can buy the kits in any of these configurations on our website.
We also have smaller-sized lights; this is the light we call it chip, we have a smaller light, the Nano and we have a very very small light, the Pico. I can show you what these lights look like. The biggest light that we’re talking about, that’s the chip. You can see the Nano still very bright but it’s about half the size. Then the Pico is very bright for its size but it’s about half the size of the Nano. We also offer this kit in cool white, and you can see cool white here in the Pico size. It’s a little more blueish. Some people think it looks like natural daylight and this looks more like indoor light or incandescent light. We sell both and we sell a fair number of both.
When you first get your kit, you’re going to see there are quite a few parts in here and it might be a little bit confusing if you have never worked with electricity or LEDs. In this kit there’s a coin cell holder with an on and off switch, there’s a coin cell, there’s some shrink tube to put over your connections, and then there’s the light.
The first thing I like to do is go ahead and get the coin cell out and test the light because I want to see how much light this gives for my project and it’s nice to be able to hold the light in the position we’re considering installing it before you install it. So now when you light the light, you’re going to want to put the red wire on the shiny side of the battery and the green wire on the rough side of the battery. That’s how you would light it, and now with the light lit just in my hand, you can see there’s a brighter side and a dimmer side. This is the back of the light and it’s not quite as bright, this is the front of the light and this is the way you’re going to want to install it. So you can see that I can hold this any place I want and test it for brightness before I install it in my project.
Okay, so what are the other pieces here? There’s a shrink tube, you’re going to want to do with the shrink tube is thread it down onto your wires. Then you’re just going to twist red to red, and go ahead and twist it quite a bit, you want to make sure you have a really good twist there because this is going to have to stay nice and solid. Then you’re going to do the same thing with the green, the green wire goes to the black wire. Then we’re going to slide our shrink tube over the connections.
What I like to do at this point, especially if I have a bunch of lights, say I have 4 or more lights in my project, go ahead and put in the coin cell and light it and make sure I’ve gotten everybody included in this before I shrink it. Now the coin cell has a rough side and a smooth side, like I was saying, the smooth side has a plus and the holder has a plus and that’s how you slip it in. It just slips right in and you can see we have a light. With this switch press it once turns it off, and you’re going to want to leave it off when you’re not enjoying your project, and then go ahead and press it again and it turns it on.
So now I can go ahead and use a heat source and shrink my shrink tube. You can use a lighter, a hairdryer, a heat gun, an iron, really any heat source, and just go ahead and apply a little bit of heat and then it’ll heat and shrink the shrink tube.