

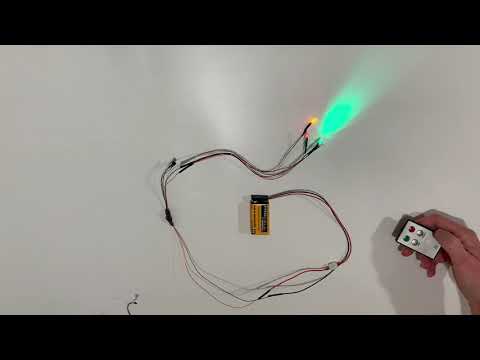


Control your LEDs in a new way!
This controller lets you turn on, turn off, or dim your LEDs remotely.
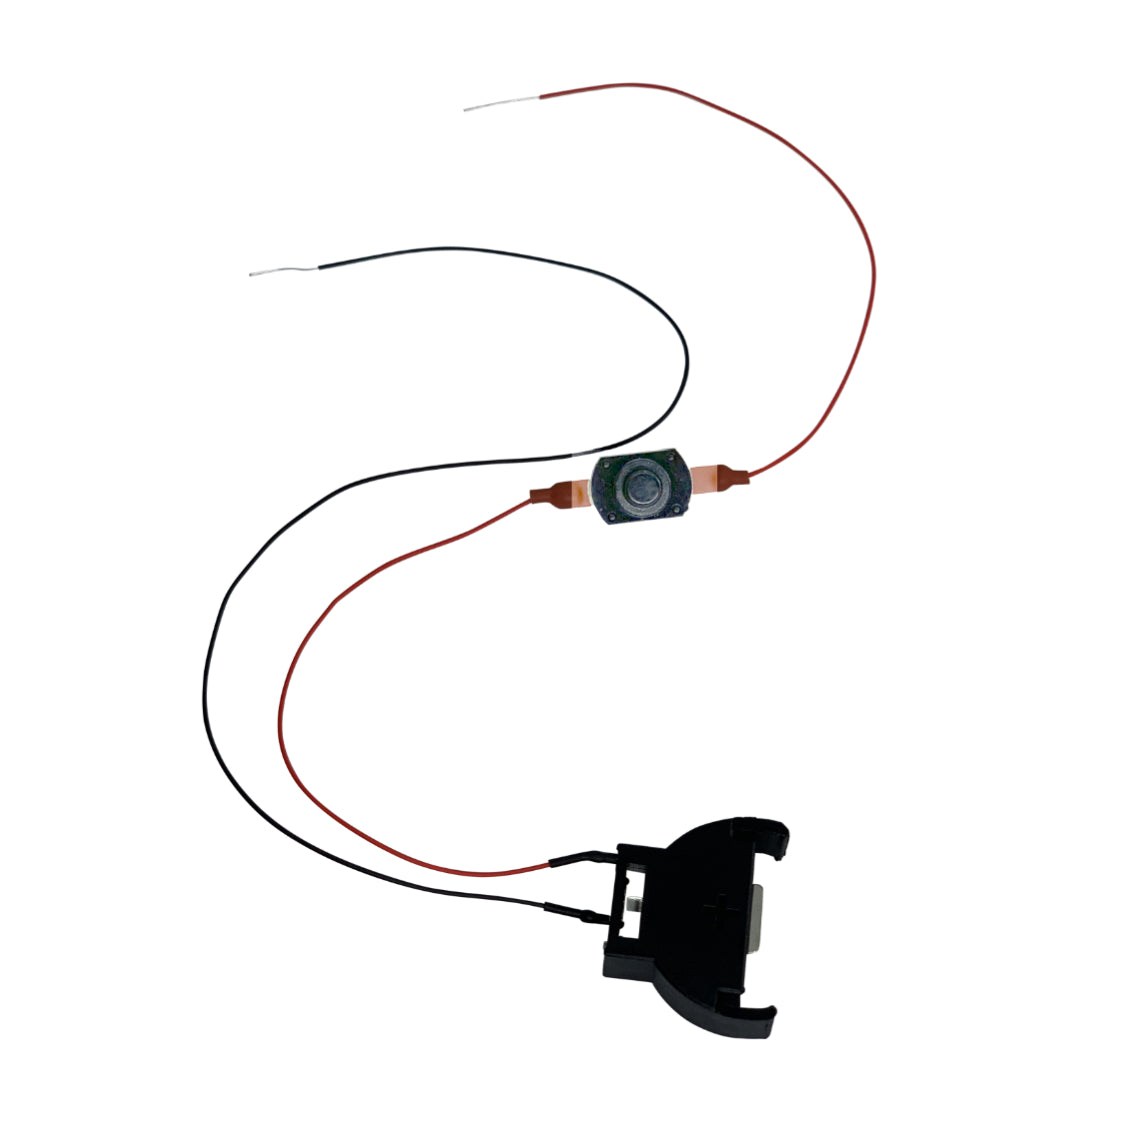
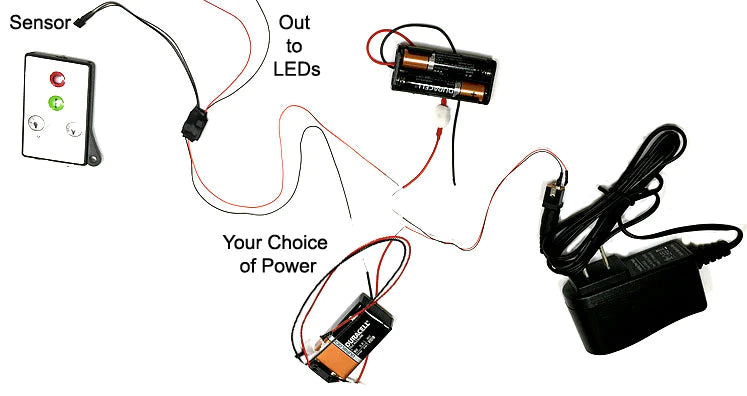
The remote has 2 components, a Handheld controller and a receiver wiring harness that you hook to your LEDs.
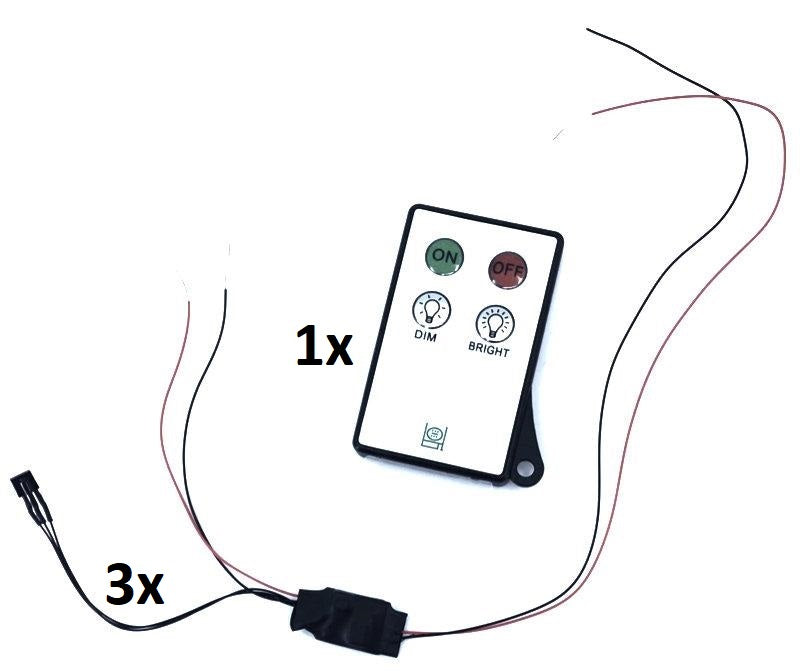
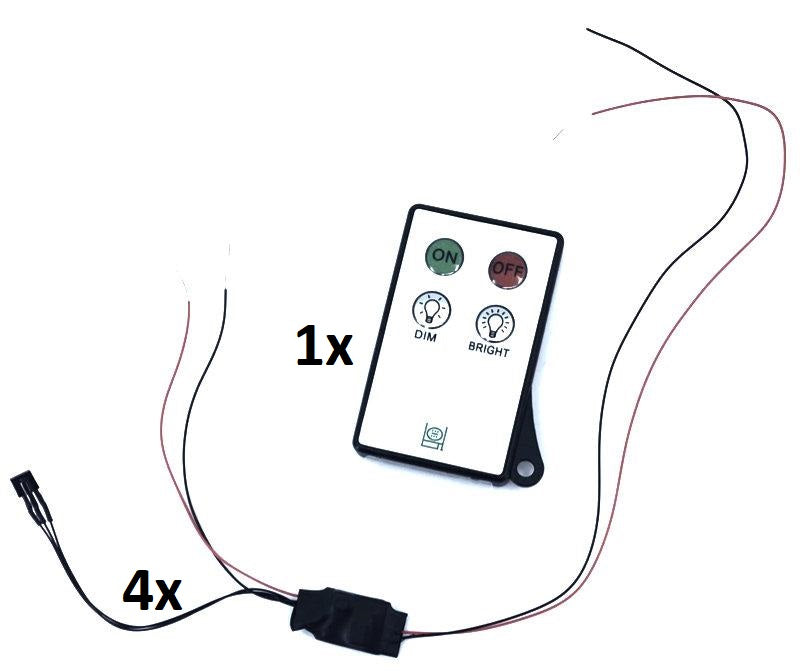
You can hook up to 30 of our LEDs (our Mega LEDs use more power, so the maximum is 20) to a receiver harness.
If you want to control more LEDs, you can get additional harnesses and use the same controller.
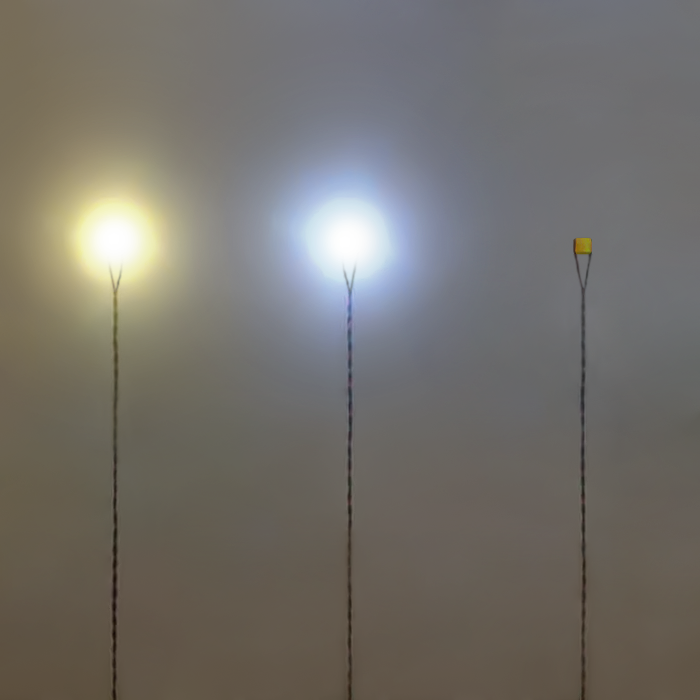
Dim your LEDs, and bring the brightness back up with the 4 dimmer settings. When you set your desired level and turn off the remote, it will remember the last setting when turned back on.
*** Precaution for Flashing LEDs and Sirens ***
The DIMMER settings on the remote can slow the flash rate of the flashing LEDs and alter the tone of the sirens. We do not recommend using the Dimmer feature on flashing LEDs or sirens.
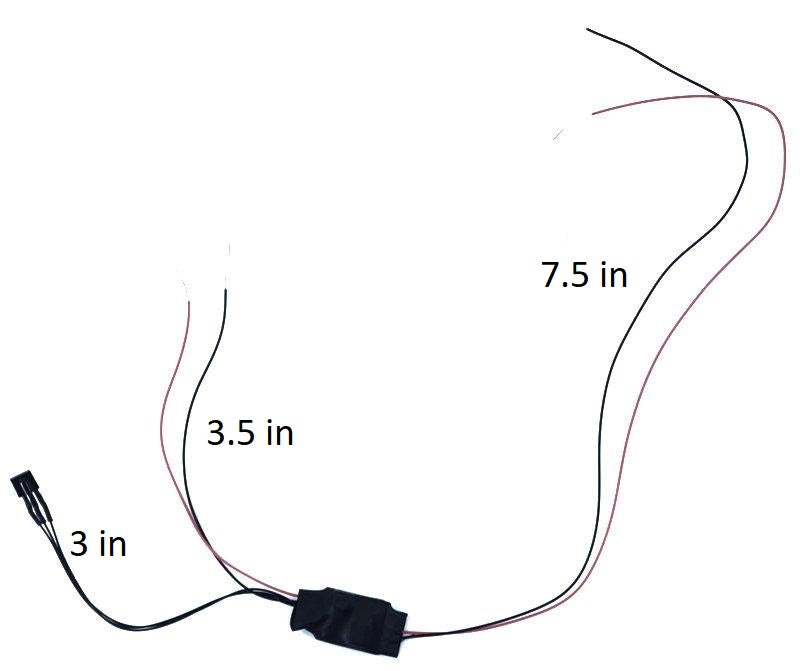
The short red and black wires go to your LEDs.Connect the short red wire to the red wire of the LEDs you want to control. Connect the short black wire to the black wires of the LEDs.
Voltage options:
3-12 Volt DC - use this option for use when using batteries, or our 3 Volt or 12 Volt Adaptors. Connect the red wire from your power to the long red input wires on the receiver. Connect black to black. The lights you use need to be appropriate for the voltage of your power supply. For example, if the power supply is 3 volts use 3-volt lights. Or if your power supply is between 5-12 Volts, use our 5-12 Volt lights.

AC / DC (up to 19 Volts) - Use this option with any hobby transformer, or other power supply that are 12 volts or more. This option has 2 black wires that connect to your power supply as the polarity of the input doesn't matter. The 12-19 volt option is only for use with our 7-19 volt LEDs.
--- Other Details on using the Remote ---
You can run up to 30 LEDs per receiver. If you need to run more, get a 2nd receiver and arrange them so the remote can activate both, or locate the sensors apart from each other to control separate groups of LEDs independently.
The black Sensor shown in the above image is the receiver of the remote signal. Put the sensor where you plan to trigger it with the remote.
The remote uses an infrared signal, and works by line of sight. So be sure to point the remote at the sensor to trigger your lights.

Point the top of the remote (where the signal emits) toward the little black sensor. Use the green button on the remote to turn your LEDs on. Use the dim button to first raise then lower your brightness. There are 4 dim settings. Click on "bright" to bring the LEDs back up to the best level for your project. Use the red button to turn off your LEDS.
Your last brightness setting is remembered so you will not need to adjust it again when you turn the LEDs back on.
The remote is line-of-sight. When you have more than one receiver, just make sure the receivers are not aligned with each other. If you turn and point the remote in a different direction, it will only ever activate the line-of-sight receiver. So you could have shelves of a display case light and turn off independently for example.
Yes, you will still need to turn off the switch when you are done with the model. Wire in the remote between your switch and the lights.
When using a wall adapter, you do not need to have a switch.
Yes, the dimmer does reduce the amount of power being used. In our test, we put a Mega Warm on a 12 volt power supply. At the brightest setting, or with no receiver attached, the Mega uses 30 milliamps of power.
Then we tried the dimmer:
| Dimmer Setting | Milliamp Draw |
| Full Bright | 30 mA |
| Dim 1 | 27 mA |
| Dim 2 | 20mA |
| Dim 3 (the last setting) | 13mA |
So dimming can save over 50% of battery life, if you like the brightness.

