Model Builder Community: Upload & download MB4 files. Share model buildings, building plans, dioramas, model layouts & more!
Locating Tools in Model Builder
Tips
Enhancing your buildings with Model Builder
Model Builder is the perfect way to create buildings for your model railroad project; it gives you hundreds of options that allow you to design an unlimited number of buildings for your towns.
There is more that you can do to enhance the buildings you have created, making them look even better and change good looking buildings to prize winning finished products.
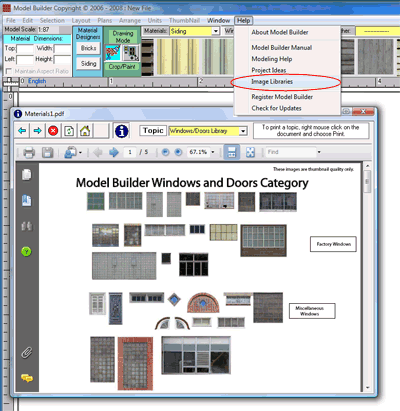
How do I change my paper orientation
or add pages to a project?
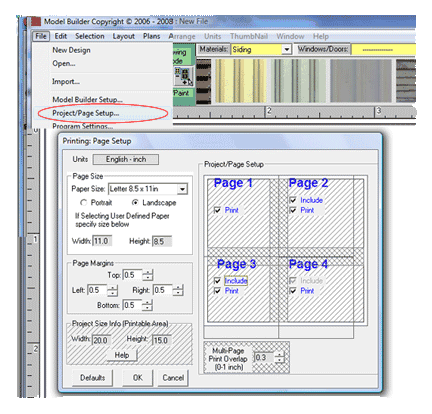
How do I set my preferences in Model Builder?
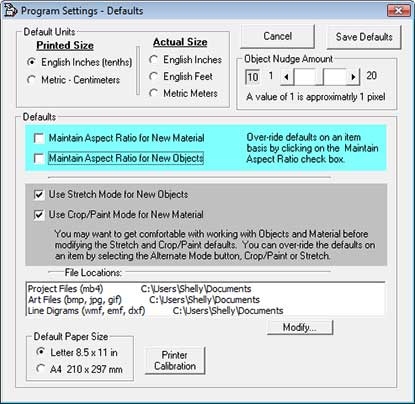
In the Program Settings area, you can set your defaults for a lot of different things.
- set your preferred ruler units
- set the amount of movement your keyboard arrow keys move items (nudge them) on the screen
- decide if you want to maintain the dimensions (ratio) when you stretch materials and objects
- set the crop and paint modes
- set the default location to save your MB files to
- set the default location to open imported images from
- set the default location to open your own line drawing files from
- calibrate your printer
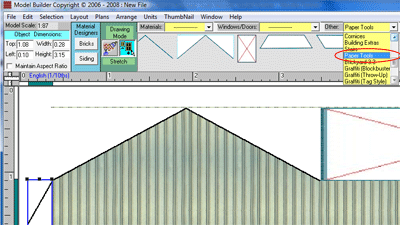
Where are the Paper Tools?
Paper tools are located in the "Other" category drop-down list. Paper tools can be handy for making roof lines, or marking cut outs. These tools are also handy if you like to put on glue tabs to get ready for later assembly.
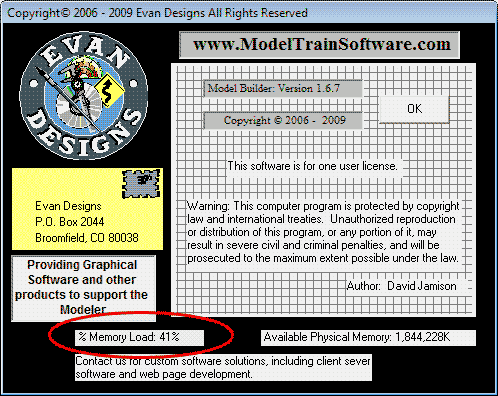
How do I check my memory for printing?
If your memory load is over 85% then the printing process can be quite slow as Model Builder tries to get the needed memory. Model Builder files will be larger and take longer to print than a typical word document because Model Builder files have high resolution and a lot of detail.
Errors can occur when the file you are printing is fairly large and there is low memory on your computer. To get the % memory down, try closing some of the other programs you are running. Then re-check the "Help" > "About Model Builder" to be sure you have enough memory available to print.
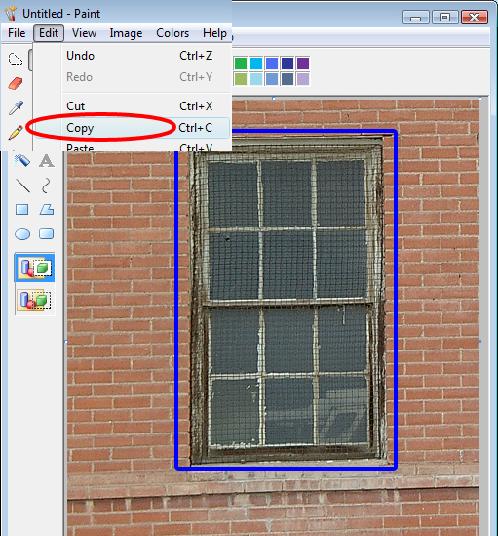
How do I import images I have?
Open an image in your photo software. All windows computers have Microsoft Paint. Select the item you want and use the windows clipboard edit>copy. Back in Model Builder, use edit>paste to place your new window in your project.
Errors can occur when the file you are printing is fairly large and there is low memory on your computer. To get the % memory down, try closing some of the other programs you are running. Then re-check the "Help" > "About Model Builder" to be sure you have enough memory available to print.
How do I crop or stretch materails I have on the screen?
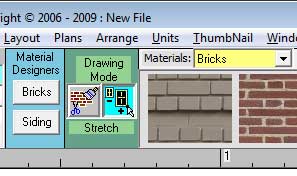
When you drop brick onto the screen, the WHITE sizing squares let you put more brick into your project in your same scale. Brick, windows and doors are already correctly sized for your scale automatically when you drop them onto the screen.
There are some times when you might want to make materials bigger/smaller or you might want to paint more windows into your project.
If you want to make a brick bigger, click the right button under the "drawing mode label" (it is a picture of a window getting bigger) If you click the symbol you will see black sizing squares around your brick. Drag a BLACK sizing square and your brick will get bigger.
If you want to crop or paint a window or door, click your object and then click the paintbrush scissors symbol. Your object will have white squares around it and you can crop or paint the object.
